How To Create an Event Floor Plan

If you’re an event organizer just starting out, there’s a chance you aren’t creating a floor plan for your event and you’re setting up on your event day on vibes 👀
An event floor plan may not seem important to you, but there are many reasons why it’s best to create one. If you’ve been working with an event planner for your events, they’re usually in charge of doing this for you. However, beginner event organizers usually don’t have the resources to do this, but that’s why we’re here to help you out.
In this blog post, we’ll tell you all about what a floor plan is, why you need one, and give you a step- tips for creating your very first event floor plan.
What is an event floor plan?
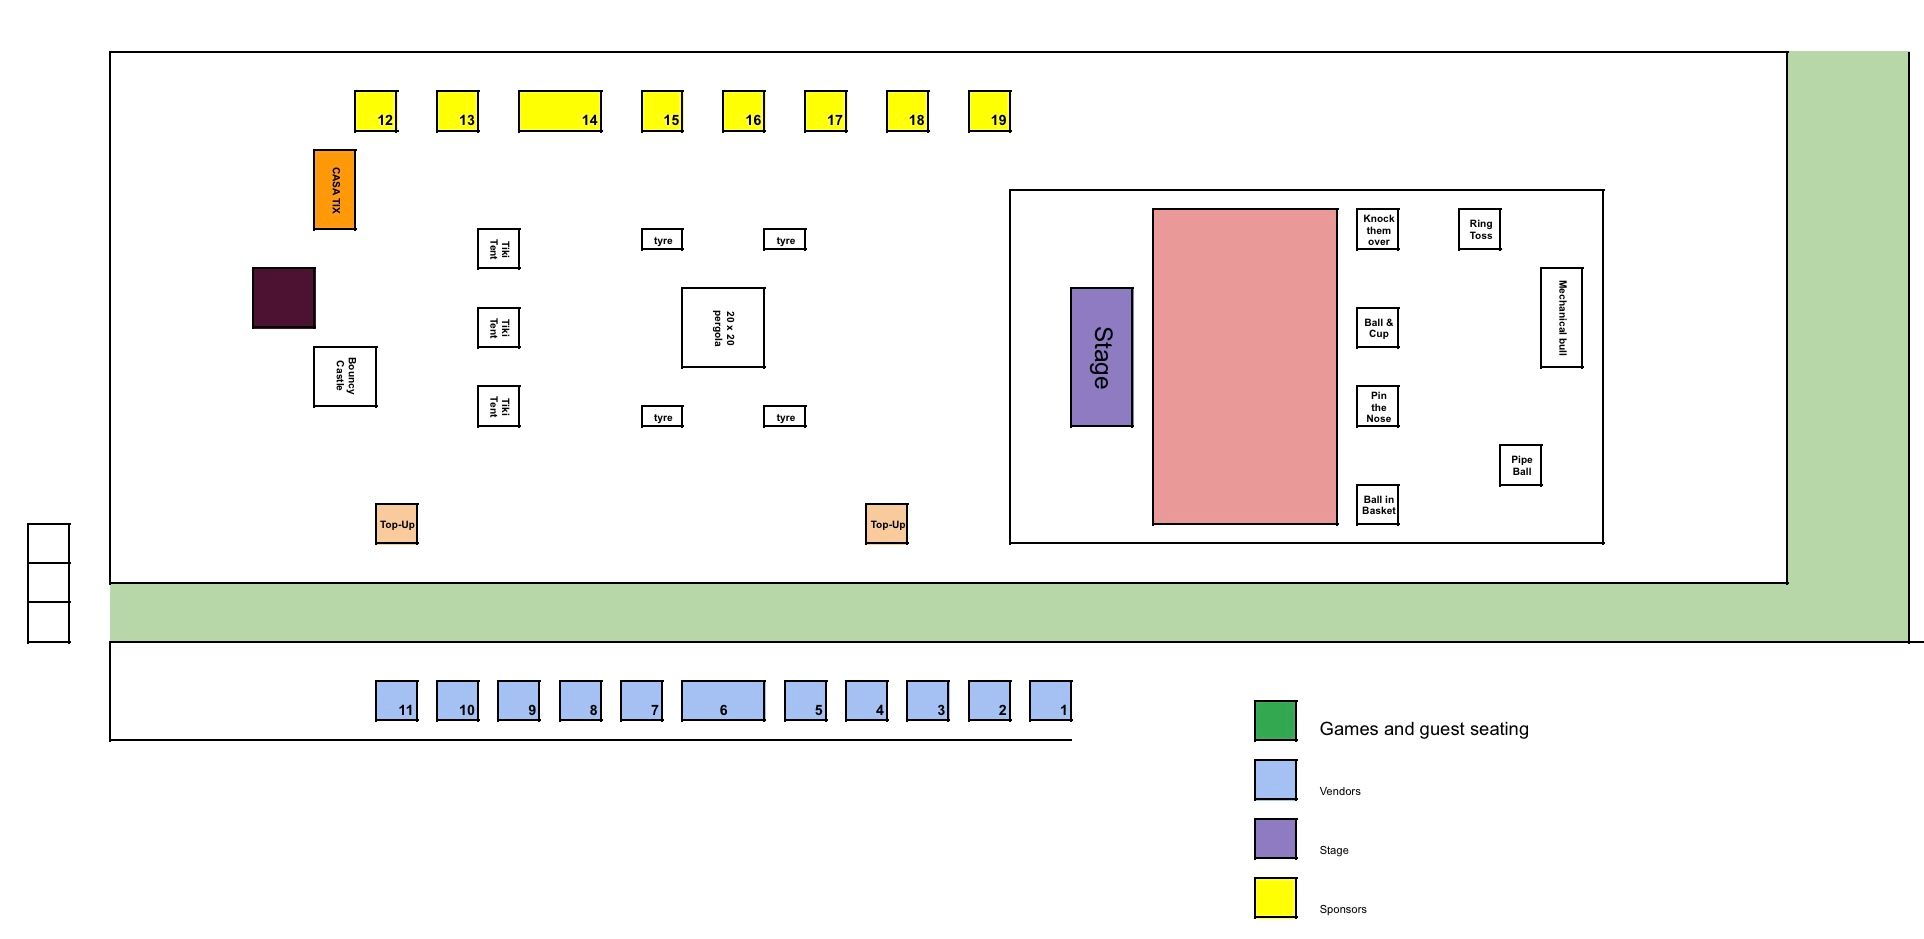
An event floor plan is a visual representation of the layout of an event space. It can be used to plan the placement of tables, chairs, the stage, vendor stations, and other elements of the event.
Why do you need one?
There are several reasons why it is important to create an event floor plan. First, it can help to ensure that your event space is used efficiently. If you carefully plan the placement of your event elements in your floor plan, you can maximize the amount of space available and create an event flow that will help guests to move easily around your venue.
An event floor plan can also help to create a sense of order and organization when setting up your venue. By clearly marking the location of different areas, such as the check-in desk, vendor stations, and restrooms, it makes it much easier to set up decorations and furniture right before your event.
How do you create an event floor plan?
Experienced event planners usually use apps like Social Tables, SmartDraw, or even Google Sheets like we used for Tixieland, to create event floor plans. However, this blog post is for beginners who don’t have experience with such apps. Here’s a step-by-step guide to creating your first event floor plan with Canva, a free app we talked about in our blog post about event planning apps for beginner creators.
Step 1: Assess your event requirements
Like we’ve said in other blog posts, for most event planning tasks, you need to figure out the purpose and goals of your event. Specifically, to create a useful floor plan, you need to know the number of attendees you’re expecting, the desired vibe of your event, the event activities, and what venue you’re using.
Step 2: Gather information about your venue
If you can, request a layout from your venue. However, if there isn’t one available, then we’d recommend surveying the venue yourself, and taking accurate measurements of the space.
Measurements are important, but mapping out the layout of your venue is the most crucial step for creating a floor plan. While surveying your venue, take note of where the parking spaces, toilets, and all entrances are. This information will help you figure out where to place other elements of your event.
Step 3: Start by creating a basic layout of your space
Okay, now we’re about to get to work. We mentioned earlier that we’re using Canva for this, so the first thing you need to do is open your Canva app and create a custom design with the measurements of your venue. If you don’t have the measurements, not to worry. You can work with any of the templates Canva has and adapt it to the shape and layout of your venue.
This will help you to visualize the overall flow of your event before you start to add elements to your floor plan.
Step 4: Add elements to the floor plan
When we say elements, we mean the check-in desk, stage, tables and chairs, sound equipment, event activities, vendor station, and so on. Consider how much space these elements will need and how much of traffic from your attendees that they will attract. This will help to inform where certain elements should be placed on your floor plan.
For instance, the check-in desk should be placed close an the event entrance and other high-traffic elements like the stage shouldn’t be placed near it to avoid overcrowding and rowdiness.
Step 5: Get feedback from others and adjust the layout as needed
Planning an event isn’t usually a one-person task, and creating a floor plan should follow suit too. Ask important people involved in your process to review your floor plan and provide feedback. These could be your decorator, some of your vendors or even your MC.
Having another set of eyes on your work can help you make sure that your floor plan is functional and that it meets the various needs of your event.
Step 6: Finalize the floor plan
Once you and all your stakeholders are happy with the layout and the placement of the elements on your floor plan, finalize the floor plan and save it for your set-up day!
Now you know how to create a floor plan that’s functional, efficient, and aesthetically pleasing with a simple and easy-to-use app like Canva! Did you love this step-by-step guide? Subscribe to the Tix blog for more tips like this!